
Also published on Medium
Facial recognition systems are steadily making their way into our everyday lives. Built on AI, they can (with varying degrees of accuracy) pick you out of a crowd and identify you as an individual leading to all manner of consequences. Depending on where you live in the world, they are able to unlock your phone screen, pay for your chicken, get you arrested, keep you away from Taylor Swift and find your dream guy.


But how do these systems actually work, how accurate are they and who has permission to deploy them? To find out, let’s make one ourselves using free, open source software and pictures of friends.
Setting it up — downloading everything we need for the programme to run
1. Download the text editor Sublime Text and when it has finished, open it up and follow the installation instructions. This is where we will write the code which will become the programme.
2.Check to see if you already have Python 3 on your computer. This is the programming language that we will write in. To do this for Macs open Terminal (in the Utilities folder in Applications) or for Windows open Command Prompt (press Windows + X and select Command Prompt). Then type the following and press enter:
python3 — version
if it says Python 3.7.3, ignore step 3. Otherwise continue.
3. Download Python 3. For Windows, when the download has finished, open up the python.exe file and under the ‘Modify’ menu, make sure ‘pip’ and ‘Add Python to environment variables’ is ticked and then press ‘install’.
4. Go to Terminal or Command Prompt again and type the following, pressing enter after each line to install the packages we need. The fourth line ‘dlib’ may take a while.
pip3 install cmake
pip3 install face_recognition
pip3 install numpy
pip3 install dlib
pip3 install opencv-python
If the final command asked you to install Xcode (for Macs), go to the App Store and install. This may take a while as it is quite large. Then re-type the last line (pip3 install opencv-python) and press enter.
Making and Running the Programme
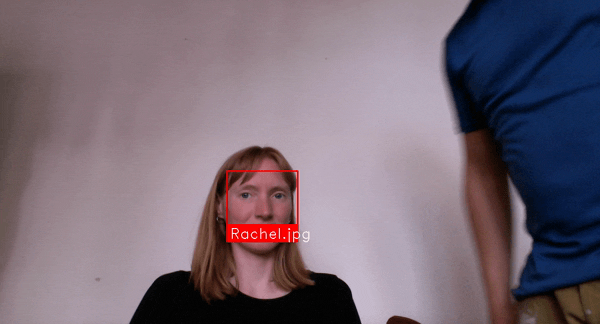
1. Copy and paste this open source piece of code into Sublime Text. It may be easier to click ‘view raw’ at the bottom of the image to do this.
2. Save this file in the Desktop folder on your computer as recognise_face.py and create a folder called known_people (make sure this is also in the Desktop folder).
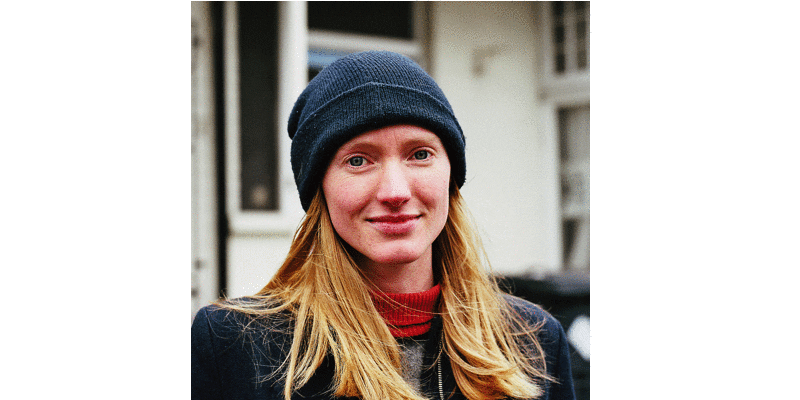
3. Now we can add pictures of people we wish to identify by saving an image of their face in the known_people folder. Make sure the person is facing forwards and is the only person in the photograph (crop if necessary). We name each file as the person’s name, as we wish it to appear on screen. In this case, only the .jpg files will be used.

Now we can run the programme by going back to the Terminal (Mac) or Command Prompt (Windows), writing the following and pressing enter
cd Desktop
python3 recognise_face.py
if an error message appears try:
python recognise_face.py
Pressing Ctrl + c with the Terminal window selected will exit the programme.
What is happening here?
This blog post by Adam Geitgey explains in detail how this system works (and is very good).
To summarise, the face recognition process can be broken down into four steps.
- Detect any faces which appear in the frame.
2. Locate specific points on the face, for example the tip of the nose and the corners of each eye to create a mask. Then move that mask so that it is facing straight ahead using only transformations that preserve the original shape e.g rotation and zooming.
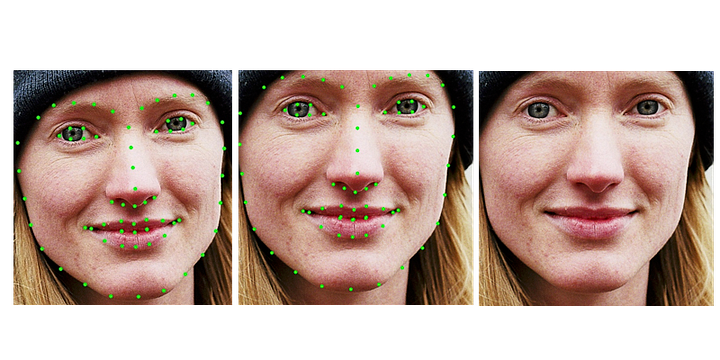
3. Encoding. This stage is about identifying key parts of a face (through the eyes of a computer) that will be similar for any photo of the same person and different for an image of anybody else. For humans this may be eye colour, hair style, nose shape etc but for computer vision, there is a highly effective set of 128 measurements for each face known as an embedding. These measurements have been found using machine learning by comparing thousands of images of labeled faces. We can then access a pre-trained network generated by this process to find the measurements we need.

- Compare the 128 measurements from the faces detected in step 1 to all of those from the images in the known_people folder. If a similar enough set of measurements is found in this folder, it’s a match!
How accurate is this?
With a set of around 30 faces to recognise, this method holds up well. But what about if you were to scrape a picture of every one of your Facebook friends? Since the average user has 338 of them, this is a much larger set for comparison and would surely lead to ambiguity? In the next blog post, we will test this out, consider the legalities of making and utilising such an application and look further in to current applications of face recognition technology.